
目录
- 普通生产者
- 带回调的生产者
- 自定义分区器
- kafka事务提交
- 简单消费
- 指定topic、partition、offset消费
- 批量消费
- 监听异常处理器
- 消息过滤器
- 消息转发
- 定时启动/停止监听器
一、环境准备
1、在项目中连接kafka
advertised.listeners=PLAINTEXT://112.126.74.249:9092
2、创建Topic
[root@iZ2zegzlkedbo3e64vkbefZ ~]#  cd /usr/local/kafka-cluster/kafka1/bin/
[root@iZ2zegzlkedbo3e64vkbefZ bin]# ./kafka-topics.sh --create --zookeeper 172.17.80.219:2181 --replication-factor 2 --partitions 2 --topic topic1
Created topic topic1.
[root@iZ2zegzlkedbo3e64vkbefZ bin]# ./kafka-topics.sh --create --zookeeper 172.17.80.219:2181 --replication-factor 2 --partitions 2 --topic topic2
Created topic topic2.
当然我们也可以不手动创建topic,在执行代码kafkaTemplate.send("topic1", normalMessage)发送消息时,kafka会帮我们自动完成topic的创建工作,但这种情况下创建的topic默认只有一个分区,分区也没有副本。所以,我们可以在项目中新建一个配置类专门用来初始化topic,如下,
@Configuration
public class KafkaInitialConfiguration {
// 创建一个名为testtopic的Topic并设置分区数为8,分区副本数为2
@Bean
public NewTopic initialTopic() {
return new NewTopic("testtopic",8, (short) 2 );
}
// 如果要修改分区数,只需修改配置值重启项目即可
// 修改分区数并不会导致数据的丢失,但是分区数只能增大不能减小
@Bean
public NewTopic updateTopic() {
return new NewTopic("testtopic",10, (short) 2 );
}
}
3、新建SpringBoot项目
<dependency>
    <groupId>org.springframework.kafka</groupId>
    <artifactId>spring-kafka</artifactId>
</dependency>
###########【Kafka集群】########### spring.kafka.bootstrap-servers=112.126.74.249:9092,112.126.74.249:9093 ###########【初始化生产者配置】########### # 重试次数 spring.kafka.producer.retries=0 # 应答级别:多少个分区副本备份完成时向生产者发送ack确认(可选0、1、all/-1) spring.kafka.producer.acks=1 # 批量大小 spring.kafka.producer.batch-size=16384 # 提交延时 spring.kafka.producer.properties.linger.ms=0 # 当生产端积累的消息达到batch-size或接收到消息linger.ms后,生产者就会将消息提交给kafka # linger.ms为0表示每接收到一条消息就提交给kafka,这时候batch-size其实就没用了 # 生产端缓冲区大小 spring.kafka.producer.buffer-memory = 33554432 # Kafka提供的序列化和反序列化类 spring.kafka.producer.key-serializer=org.apache.kafka.common.serialization.StringSerializer spring.kafka.producer.value-serializer=org.apache.kafka.common.serialization.StringSerializer # 自定义分区器 # spring.kafka.producer.properties.partitioner.class=com.felix.kafka.producer.CustomizePartitioner ###########【初始化消费者配置】########### # 默认的消费组ID spring.kafka.consumer.properties.group.id=defaultConsumerGroup # 是否自动提交offset spring.kafka.consumer.enable-auto-commit=true # 提交offset延时(接收到消息后多久提交offset) spring.kafka.consumer.auto.commit.interval.ms=1000 # 当kafka中没有初始offset或offset超出范围时将自动重置offset # earliest:重置为分区中最小的offset; # latest:重置为分区中最新的offset(消费分区中新产生的数据); # none:只要有一个分区不存在已提交的offset,就抛出异常; spring.kafka.consumer.auto-offset-reset=latest # 消费会话超时时间(超过这个时间consumer没有发送心跳,就会触发rebalance操作) spring.kafka.consumer.properties.session.timeout.ms=120000 # 消费请求超时时间 spring.kafka.consumer.properties.request.timeout.ms=180000 # Kafka提供的序列化和反序列化类 spring.kafka.consumer.key-deserializer=org.apache.kafka.common.serialization.StringDeserializer spring.kafka.consumer.value-deserializer=org.apache.kafka.common.serialization.StringDeserializer # 消费端监听的topic不存在时,项目启动会报错(关掉) spring.kafka.listener.missing-topics-fatal=false # 设置批量消费 # spring.kafka.listener.type=batch # 批量消费每次最多消费多少条消息 # spring.kafka.consumer.max-poll-records=50
二、生产者实践
1、简单生产者
@RestController
public class KafkaProducer {
@Autowired
private KafkaTemplate<String, Object> kafkaTemplate;
// 发送消息
@GetMapping("/kafka/normal/{message}")
public void sendMessage1(@PathVariable("message") String normalMessage) {
kafkaTemplate.send("topic1", normalMessage);
}
}
2、简单消费
@Component
public class KafkaConsumer {
    // 消费监听
    @KafkaListener(topics = {"topic1"})
    public void onMessage1(ConsumerRecord<?, ?> record){
        // 消费的哪个topic、partition的消息,打印出消息内容
        System.out.println("简单消费:"+record.topic()+"-"+record.partition()+"-"+record.value());
    }
}
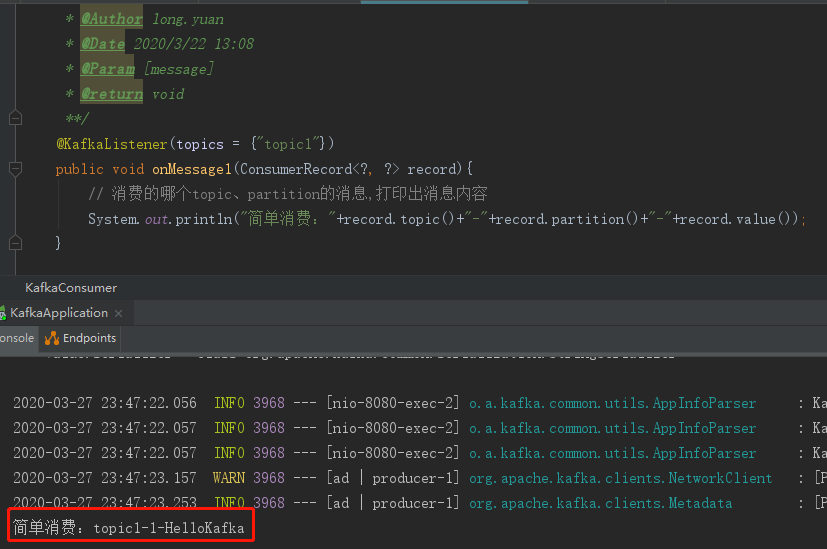
上面示例创建了一个生产者,发送消息到topic1,消费者监听topic1消费消息。监听器用@KafkaListener注解,topics表示监听的topic,支持同时监听多个,用英文逗号分隔。启动项目,postman调接口触发生产者发送消息,

3、带回调的生产者
@GetMapping("/kafka/callbackOne/{message}")
public void sendMessage2(@PathVariable("message") String callbackMessage) {
    kafkaTemplate.send("topic1", callbackMessage).addCallback(success -> {
        // 消息发送到的topic
        String topic = success.getRecordMetadata().topic();
        // 消息发送到的分区
        int partition = success.getRecordMetadata().partition();
        // 消息在分区内的offset
        long offset = success.getRecordMetadata().offset();
        System.out.println("发送消息成功:" + topic + "-" + partition + "-" + offset);
    }, failure -> {
        System.out.println("发送消息失败:" + failure.getMessage());
    });
}
@GetMapping("/kafka/callbackTwo/{message}")
public void sendMessage3(@PathVariable("message") String callbackMessage) {
    kafkaTemplate.send("topic1", callbackMessage).addCallback(new ListenableFutureCallback<SendResult<String, Object>>() {
        @Override
        public void onFailure(Throwable ex) {
            System.out.println("发送消息失败:"+ex.getMessage());
        }

        @Override
        public void onSuccess(SendResult<String, Object> result) {
            System.out.println("发送消息成功:" + result.getRecordMetadata().topic() + "-"
                    + result.getRecordMetadata().partition() + "-" + result.getRecordMetadata().offset());
        }
    });
}
4、自定义分区器
public class CustomizePartitioner implements Partitioner {
@Override
public int partition(String topic, Object key, byte[] keyBytes, Object value, byte[] valueBytes, Cluster cluster) {
// 自定义分区规则(这里假设全部发到0号分区)
// ......
return 0;
}
@Override
public void close() {
}
@Override
public void configure(Map<String, ?> configs) {
}
}
在application.propertise中配置自定义分区器,配置的值就是分区器类的全路径名,
# 自定义分区器
spring.kafka.producer.properties.partitioner.class=com.felix.kafka.producer.CustomizePartitioner
如果在发送消息时需要创建事务,可以使用 KafkaTemplate 的 executeInTransaction 方法来声明事务,
@GetMapping("/kafka/transaction")
public void sendMessage7(){
// 声明事务:后面报错消息不会发出去
kafkaTemplate.executeInTransaction(operations -> {
operations.send("topic1","test executeInTransaction");
throw new RuntimeException("fail");
});
// 不声明事务:后面报错但前面消息已经发送成功了
kafkaTemplate.send("topic1","test executeInTransaction");
throw new RuntimeException("fail");
}
三、消费者实践
1、指定topic、partition、offset消费
/**
 * @Title 指定topic、partition、offset消费
 * @Description 同时监听topic1和topic2,监听topic1的0号分区、topic2的 "0号和1号" 分区,指向1号分区的offset初始值为8
 * @Author long.yuan
 * @Date 2020/3/22 13:38
 * @Param [record]
 * @return void
 **/
@KafkaListener(id = "consumer1",groupId = "felix-group",topicPartitions = {
        @TopicPartition(topic = "topic1", partitions = { "0" }),
        @TopicPartition(topic = "topic2", partitions = "0", partitionOffsets = @PartitionOffset(partition = "1", initialOffset = "8"))
})
public void onMessage2(ConsumerRecord<?, ?> record) {
    System.out.println("topic:"+record.topic()+"|partition:"+record.partition()+"|offset:"+record.offset()+"|value:"+record.value());
}
属性解释:
2、批量消费
# 设置批量消费
spring.kafka.listener.type=batch
# 批量消费每次最多消费多少条消息
spring.kafka.consumer.max-poll-records=50
接收消息时用List来接收,监听代码如下,
@KafkaListener(id = "consumer2",groupId = "felix-group", topics = "topic1")
public void onMessage3(List<ConsumerRecord<?, ?>> records) {
    System.out.println(">>>批量消费一次,records.size()="+records.size());
    for (ConsumerRecord<?, ?> record : records) {
        System.out.println(record.value());
    }
}
3、ConsumerAwareListenerErrorHandler 异常处理器
// 新建一个异常处理器,用@Bean注入
@Bean
public ConsumerAwareListenerErrorHandler consumerAwareErrorHandler() {
return (message, exception, consumer) -> {
System.out.println("消费异常:"+message.getPayload());
return null;
};
}
// 将这个异常处理器的BeanName放到@KafkaListener注解的errorHandler属性里面
@KafkaListener(topics = {"topic1"},errorHandler = "consumerAwareErrorHandler")
public void onMessage4(ConsumerRecord<?, ?> record) throws Exception {
throw new Exception("简单消费-模拟异常");
}
// 批量消费也一样,异常处理器的message.getPayload()也可以拿到各条消息的信息
@KafkaListener(topics = "topic1",errorHandler="consumerAwareErrorHandler")
public void onMessage5(List<ConsumerRecord<?, ?>> records) throws Exception {
System.out.println("批量消费一次...");
throw new Exception("批量消费-模拟异常");
}
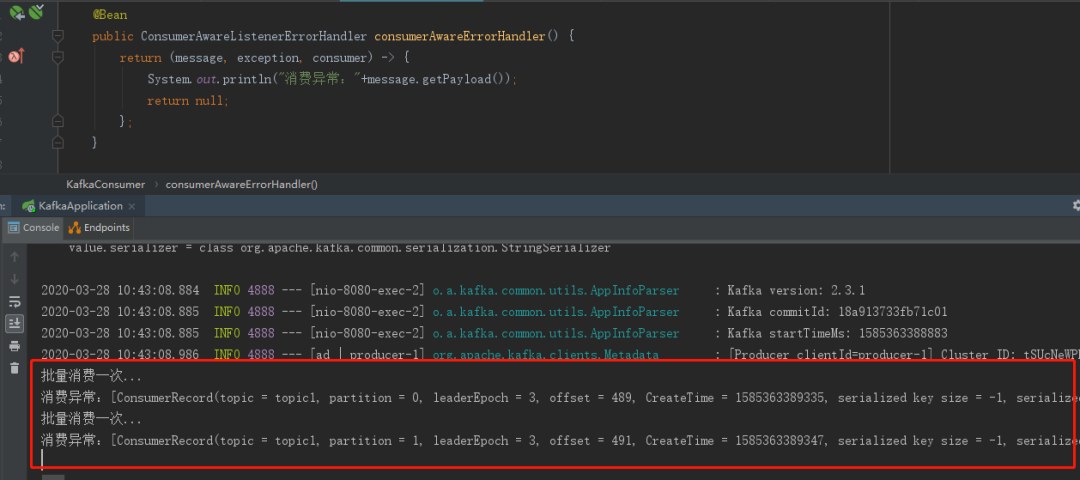
执行看一下效果,
4、消息过滤器
@Component
public class KafkaConsumer {
@Autowired
ConsumerFactory consumerFactory;
// 消息过滤器
@Bean
public ConcurrentKafkaListenerContainerFactory filterContainerFactory() {
ConcurrentKafkaListenerContainerFactory factory = new ConcurrentKafkaListenerContainerFactory();
factory.setConsumerFactory(consumerFactory);
// 被过滤的消息将被丢弃
factory.setAckDiscarded(true);
// 消息过滤策略
factory.setRecordFilterStrategy(consumerRecord -> {
if (Integer.parseInt(consumerRecord.value().toString()) % 2 == 0) {
return false;
}
//返回true消息则被过滤
return true;
});
return factory;
}
// 消息过滤监听
@KafkaListener(topics = {"topic1"},containerFactory = "filterContainerFactory")
public void onMessage6(ConsumerRecord<?, ?> record) {
System.out.println(record.value());
}
}
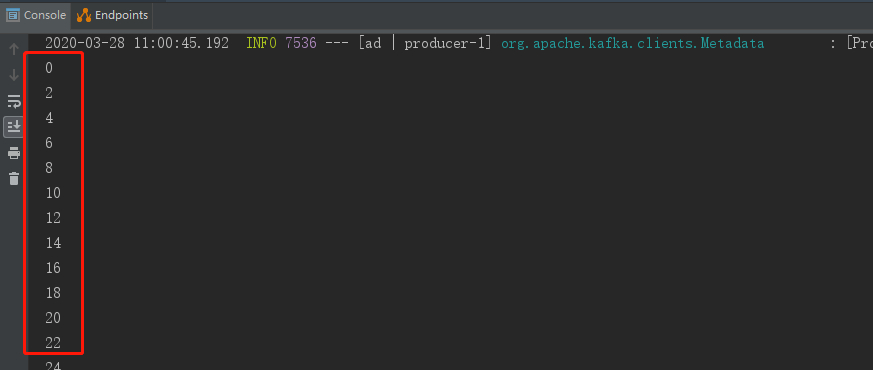
上面实现了一个"过滤奇数、接收偶数"的过滤策略,我们向topic1发送0-99总共100条消息,看一下监听器的消费情况,可以看到监听器只消费了偶数,
5、消息转发
/**
 * @Title 消息转发
 * @Description 从topic1接收到的消息经过处理后转发到topic2
 * @Author long.yuan
 * @Date 2020/3/23 22:15
 * @Param [record]
 * @return void
 **/
@KafkaListener(topics = {"topic1"})
@SendTo("topic2")
public String onMessage7(ConsumerRecord<?, ?> record) {
    return record.value()+"-forward message";
}
6、定时启动、停止监听器
@EnableScheduling
@Component
public class CronTimer {
/**
* @KafkaListener注解所标注的方法并不会在IOC容器中被注册为Bean,
* 而是会被注册在KafkaListenerEndpointRegistry中,
* 而KafkaListenerEndpointRegistry在SpringIOC中已经被注册为Bean
**/
@Autowired
private KafkaListenerEndpointRegistry registry;
@Autowired
private ConsumerFactory consumerFactory;
// 监听器容器工厂(设置禁止KafkaListener自启动)
@Bean
public ConcurrentKafkaListenerContainerFactory delayContainerFactory() {
ConcurrentKafkaListenerContainerFactory container = new ConcurrentKafkaListenerContainerFactory();
container.setConsumerFactory(consumerFactory);
//禁止KafkaListener自启动
container.setAutoStartup(false);
return container;
}
// 监听器
@KafkaListener(id="timingConsumer",topics = "topic1",containerFactory = "delayContainerFactory")
public void onMessage1(ConsumerRecord<?, ?> record){
System.out.println("消费成功:"+record.topic()+"-"+record.partition()+"-"+record.value());
}
// 定时启动监听器
@Scheduled(cron = "0 42 11 * * ? ")
public void startListener() {
System.out.println("启动监听器...");
// "timingConsumer"是@KafkaListener注解后面设置的监听器ID,标识这个监听器
if (!registry.getListenerContainer("timingConsumer").isRunning()) {
registry.getListenerContainer("timingConsumer").start();
}
//registry.getListenerContainer("timingConsumer").resume();
}
// 定时停止监听器
@Scheduled(cron = "0 45 11 * * ? ")
public void shutDownListener() {
System.out.println("关闭监听器...");
registry.getListenerContainer("timingConsumer").pause();
}
}
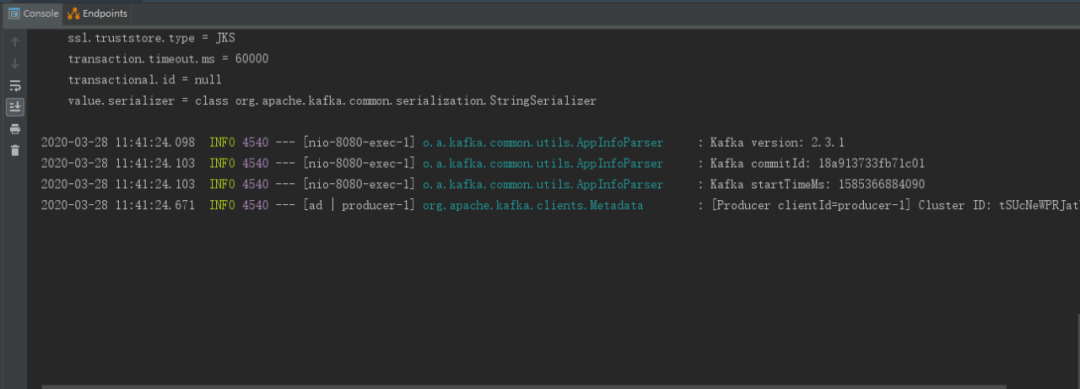
启动项目,触发生产者向topic1发送消息,可以看到consumer没有消费,因为这时监听器还没有开始工作,


参考文档
- https://mp.weixin.qq.com/s?__biz=MzU1NDA0MDQ3MA==&mid=2247483958&idx=1&sn=dffaad318b50f875eea615bc3bdcc80c
- https://mp.weixin.qq.com/s?__biz=MzU1NDA0MDQ3MA==&mid=2247483965&idx=1&sn=20dd02c4bf3a11ff177906f0527a5053
- https://blog.csdn.net/yuanlong122716/article/details/105160545/
 IDEA激活码


