java网络编程系列之JavaIO的“今生”:NIO非阻塞模型
- BIO中的阻塞
- 非阻塞式NIO
- Channel与Buffer
-
- 剖析Buffer
-
- 向Buffer中写入数据
- 剖析channel
-
- 几个重要的channel
- 多方法实现本地文件拷贝
-
- 字节输入流拷贝文件
- 字节缓冲流拷贝文件
- FileChannel拷贝文件
- 通道间的数据传输完成文件拷贝---transferto,transferfrom
- 文件拷贝的完整源码
- 文件拷贝测试结果
- 剖析Selector
-
- channel的状态变化
- 在selector上面注册channel
- 使用selector选择channel
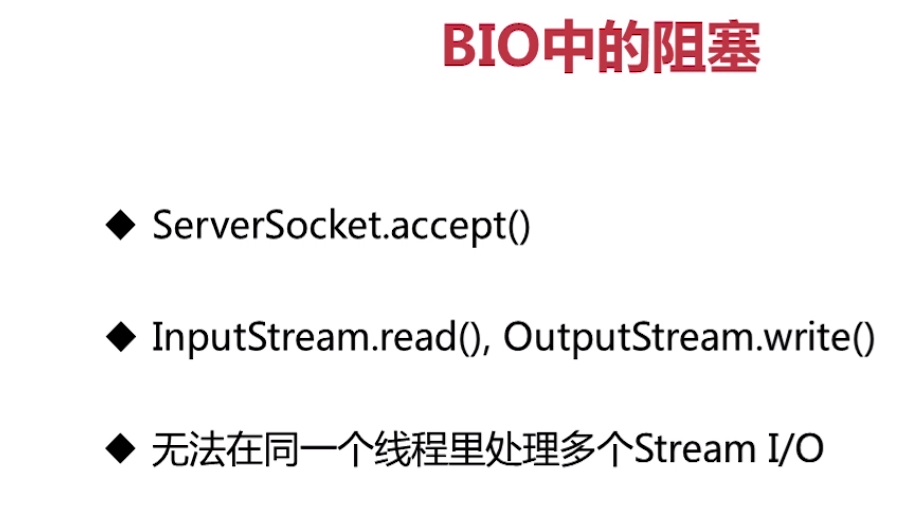
BIO中的阻塞
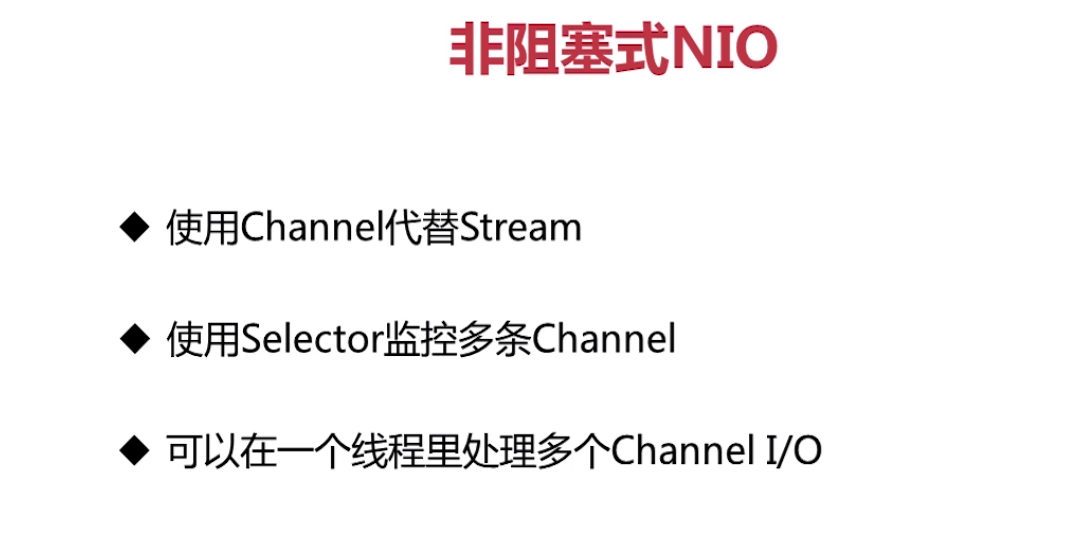
非阻塞式NIO
-
Channel: Channel 和 IO 中的 Stream(流)是差不多一个等级的。只不过 Stream 是单向的,譬如:InputStream, OutputStream。并且Channel是非阻塞式的。
Channel与Buffer

通道可以用来读取和写入数据,通道类似于之前的输入/输出流,但是程序不会直接操作通道的,所有的内容都是先读到或写入到缓冲区中,再通过缓冲区中取得获写入的。
剖析Buffer
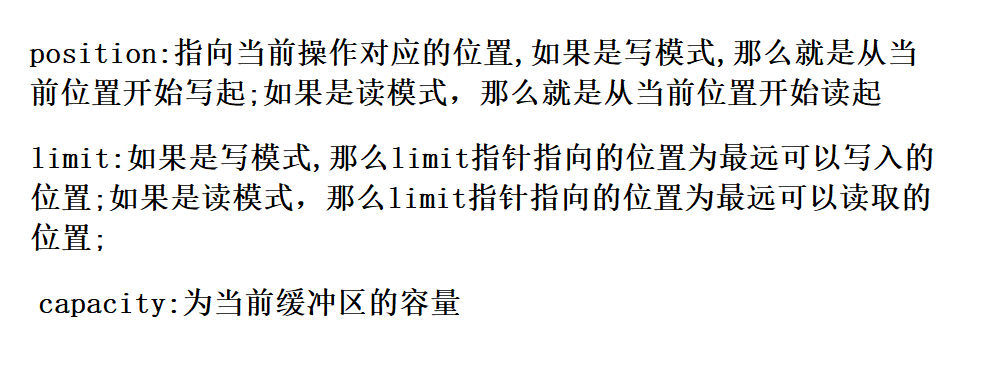
向Buffer中写入数据

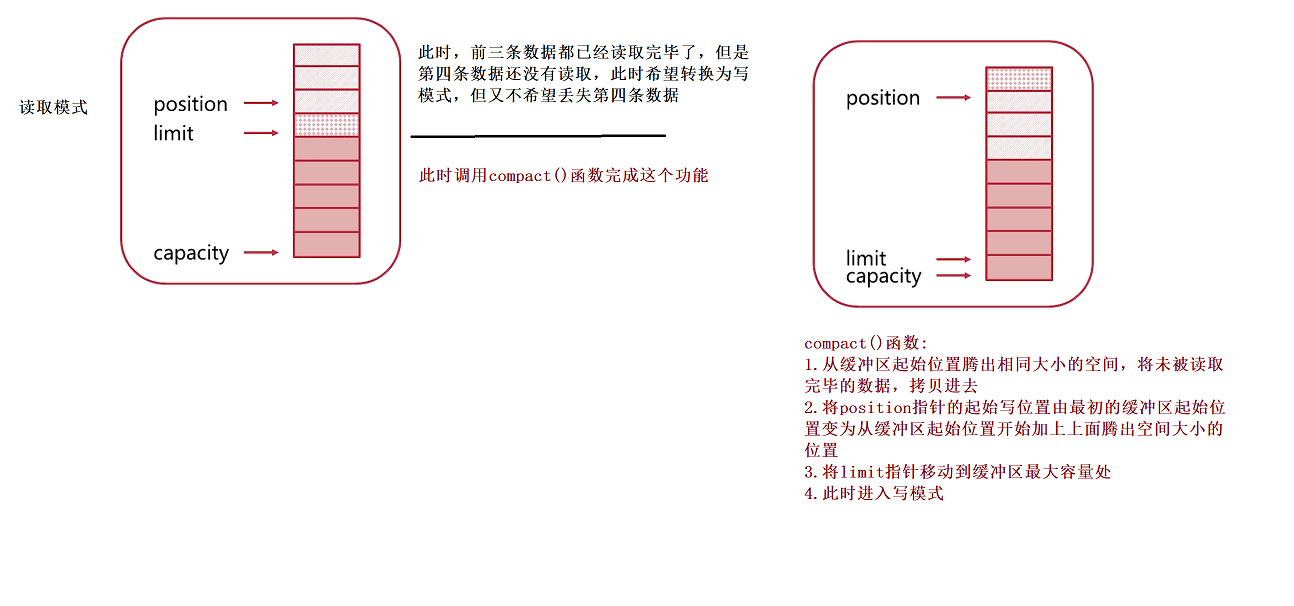
此时读取分为两种情况:
- 一次性将写入的数据全部读取出来
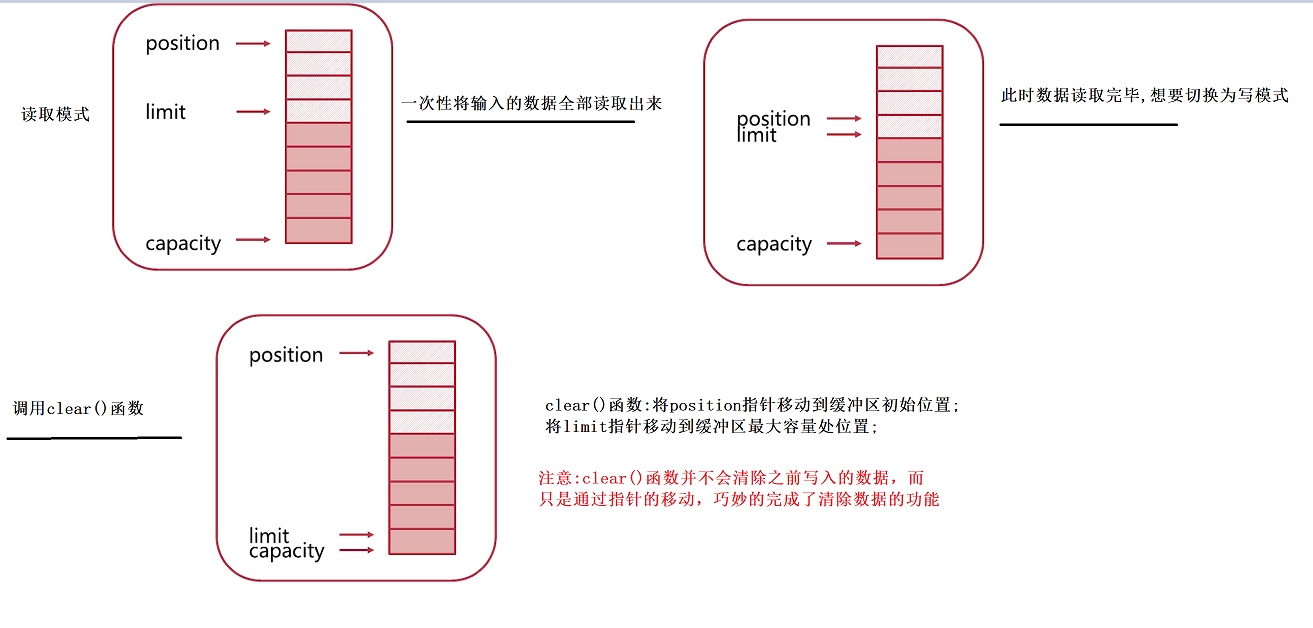
- 读取数据时,读取数据到一半,希望转换为写入模式,但是又不希望丢掉还没有读取完毕的数据
剖析channel
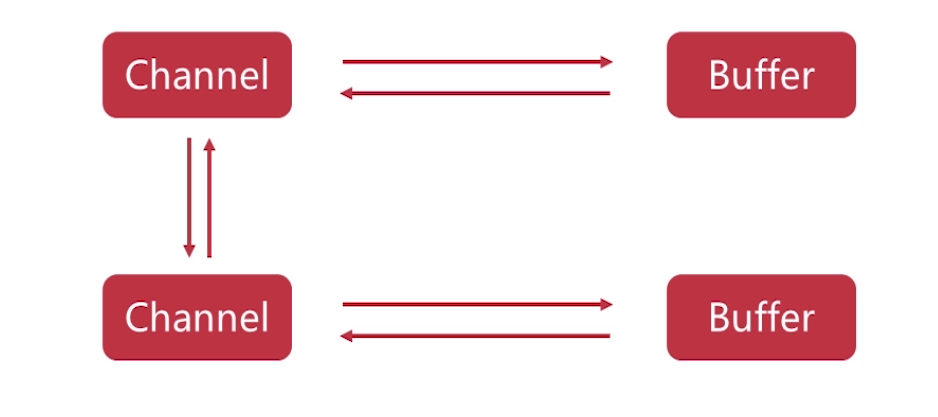
- channel可以通过buffer读取和写入数据
- 两个channel之间也可以直接进行数据间的传输
几个重要的channel

多方法实现本地文件拷贝
通用的关闭流方法
    //通用关闭流和通道的方法
    //所有可以被关闭的流和通道都实现了Closeable接口
    public static void close(Closeable closeable)
    {
        if(closeable!=null)
        {
            try {
                closeable.close();
            } catch (IOException e) {
                e.printStackTrace();
            }
        }
    }
字节输入流拷贝文件
     //字节流拷贝文件实现
      public static void noBufferStreamCopy(File src, File tar)
      {
          InputStream in=null;
          OutputStream out=null;
          try
          {
              in=new FileInputStream(src);
              out=new FileOutputStream(tar);

              //每次读取一个字节
              Integer len;
              //文件读取完毕返回-1
              while((len=in.read())!=-1)
              {
                  out.write(len);
              }
          }
          catch (FileNotFoundException e) {
              e.printStackTrace();
          } catch (IOException e) {
              e.printStackTrace();
          }finally {
              close(in);
              close(out);
          }
      }
字节缓冲流拷贝文件
     //字节缓冲流拷贝文件实现
     public static void bufferStreamCopy(File src,File tar)
     {
         BufferedInputStream bis=null;
         BufferedOutputStream bos=null;
         //使用装饰器模式
         try {

              bis = new BufferedInputStream(new FileInputStream(src));
             bos=new BufferedOutputStream(new FileOutputStream(tar));
             //准备一个缓存区,大小为1024个字节
             byte[] buffer=new byte[1024];
             int len;
             //一次性读取1024个字节
             while((len=bis.read(buffer))!=-1)
             {
                bos.write(buffer,0,len);
             }

         } catch (FileNotFoundException e) {
             e.printStackTrace();
         } catch (IOException e) {
             e.printStackTrace();
         }finally {
             close(bis);
             close(bos);
         }
     }
FileChannel拷贝文件
     //FileChannel拷贝文件
        public static void nioBufferCopy(File src,File tar)
        {
            FileChannel fin=null;
            FileChannel fout=null;
            try {
                fin=new FileInputStream(src).getChannel();
                 fout=new FileOutputStream(tar).getChannel();
               //准备一个缓冲区
                ByteBuffer byteBuffer = ByteBuffer.allocate(1024);
                while(fin.read(byteBuffer)!=-1)//将数据写入缓冲区,一次最多写入1024个字节
                {
                    //将当前缓冲区从写模式转换为读模式
                    byteBuffer.flip();
                    //一直读取到缓冲区没有数据剩余为止
                    while (byteBuffer.hasRemaining())
                    {
                        //从缓冲区中读取数据,写入通道中
                        fout.write(byteBuffer);
                    }
                    //将当前缓冲区从读模式转换为写模式
                    byteBuffer.clear();
                }
            } catch (FileNotFoundException e) {
                e.printStackTrace();
            } catch (IOException e) {
                e.printStackTrace();
            }finally {
                close(fin);
                close(fout);
            }
        }
通道间的数据传输完成文件拷贝—transferto,transferfrom
     //通道间传输完成文件拷贝
     public static void nioTransferCopy(File src,File tar)
     {
         FileChannel fin=null;
         FileChannel fout=null;
         try {
             fin=new FileInputStream(src).getChannel();
             fout=new FileOutputStream(tar).getChannel();
             //记录当前总共传输的字节数
             Long transferredBytes= 0L;
             //记录需要拷贝文件的字节总数
             Long size=fin.size();

             while(transferredBytes!=size)
             {
                 //transferTo函数每次返回当前总共拷贝了多少个字节
                 transferredBytes+=fin.transferTo(0,size,fout);
             }

         } catch (IOException e) {
             e.printStackTrace();
         }
         finally {
             close(fin);
             close(fout);
         }
     }
文件拷贝的完整源码
public class Main
{
    public static void main(String[] args) {
        final String prefix=System.getProperty("user.dir")+System.getProperty("file.separator");
        File src=new File(prefix+"src.txt");
        File tar=new File(prefix+"tar.txt");
        //测试字节流拷贝文件
     CopyFile.nioTransferCopy(src,tar);
    }

    public static class CopyFile
    {
     //字节流拷贝文件实现
      public static void noBufferStreamCopy(File src, File tar)
      {
          InputStream in=null;
          OutputStream out=null;
          try
          {
              in=new FileInputStream(src);
              out=new FileOutputStream(tar);

              //每次读取一个字节
              Integer len;
              //文件读取完毕返回-1
              while((len=in.read())!=-1)
              {
                  out.write(len);
              }
          }
          catch (FileNotFoundException e) {
              e.printStackTrace();
          } catch (IOException e) {
              e.printStackTrace();
          }finally {
              close(in);
              close(out);
          }
      }
     //字节缓冲流拷贝文件实现
     public static void bufferStreamCopy(File src,File tar)
     {
         BufferedInputStream bis=null;
         BufferedOutputStream bos=null;
         //使用装饰器模式
         try {

              bis = new BufferedInputStream(new FileInputStream(src));
             bos=new BufferedOutputStream(new FileOutputStream(tar));
             //准备一个缓存区,大小为1024个字节
             byte[] buffer=new byte[1024];
             int len;
             //一次性读取1024个字节
             while((len=bis.read(buffer))!=-1)
             {
                bos.write(buffer,0,len);
             }

         } catch (FileNotFoundException e) {
             e.printStackTrace();
         } catch (IOException e) {
             e.printStackTrace();
         }finally {
             close(bis);
             close(bos);
         }
     }
     //FileChannel拷贝文件
        public static void nioBufferCopy(File src,File tar)
        {
            FileChannel fin=null;
            FileChannel fout=null;
            try {
                fin=new FileInputStream(src).getChannel();
                 fout=new FileOutputStream(tar).getChannel();
               //准备一个缓冲区
                ByteBuffer byteBuffer = ByteBuffer.allocate(1024);
                while(fin.read(byteBuffer)!=-1)//将数据写入缓冲区,一次最多写入1024个字节
                {
                    //将当前缓冲区从写模式转换为读模式
                    byteBuffer.flip();
                    //一直读取到缓冲区没有数据剩余为止
                    while (byteBuffer.hasRemaining())
                    {
                        //从缓冲区中读取数据,写入通道中
                        fout.write(byteBuffer);
                    }
                    //将当前缓冲区从读模式转换为写模式
                    byteBuffer.clear();
                }
            } catch (FileNotFoundException e) {
                e.printStackTrace();
            } catch (IOException e) {
                e.printStackTrace();
            }finally {
                close(fin);
                close(fout);
            }
        }
     //通道间传输完成文件拷贝
     public static void nioTransferCopy(File src,File tar)
     {
         FileChannel fin=null;
         FileChannel fout=null;
         try {
             fin=new FileInputStream(src).getChannel();
             fout=new FileOutputStream(tar).getChannel();
             //记录当前总共传输的字节数
             Long transferredBytes= 0L;
             //记录需要拷贝文件的字节总数
             Long size=fin.size();

             while(transferredBytes!=size)
             {
                 //transferTo函数每次返回当前总共拷贝了多少个字节
                 transferredBytes+=fin.transferTo(0,size,fout);
             }

         } catch (IOException e) {
             e.printStackTrace();
         }
         finally {
             close(fin);
             close(fout);
         }
     }
    }

    //通用关闭流和通道的方法
    //所有可以被关闭的流和通道都实现了Closeable接口
    public static void close(Closeable closeable)
    {
        if(closeable!=null)
        {
            try {
                closeable.close();
            } catch (IOException e) {
                e.printStackTrace();
            }
        }
    }
}
文件拷贝测试结果
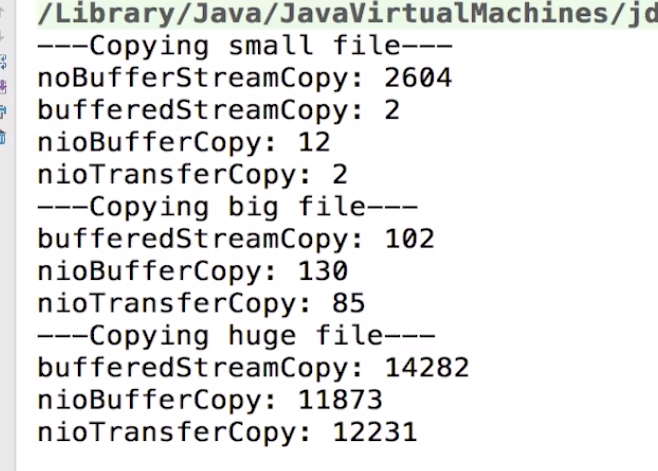
对于小文件拷贝而言,nio优势也还可以,对于大文件而言,nio的优势相对比较明显,并且大家要注意缓冲区大小的选择
剖析Selector
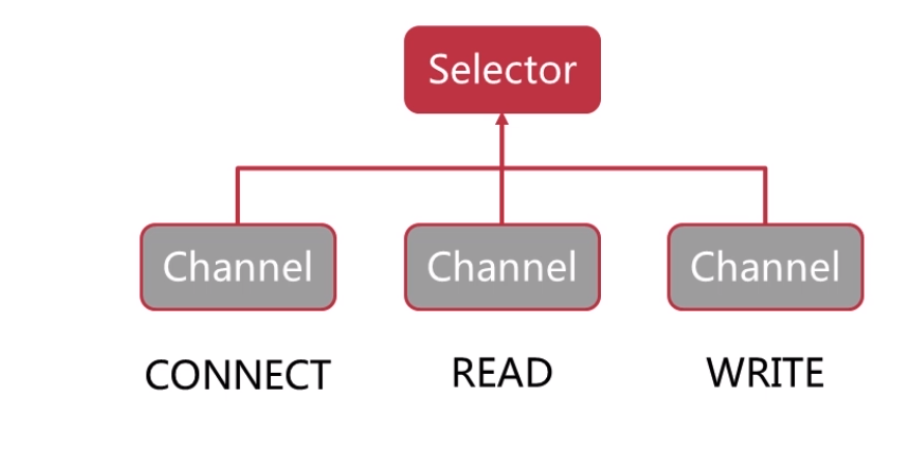
- 简而言之Selector可以帮助我们监控多个通道的状态
- 想让Selector监控对应的channel,首先需要把需要被监控的channel注册在Selector上面

在Selector上面注册三个Channel
channel的状态变化

channel可以在上面四个状态中来回切换
在selector上面注册channel
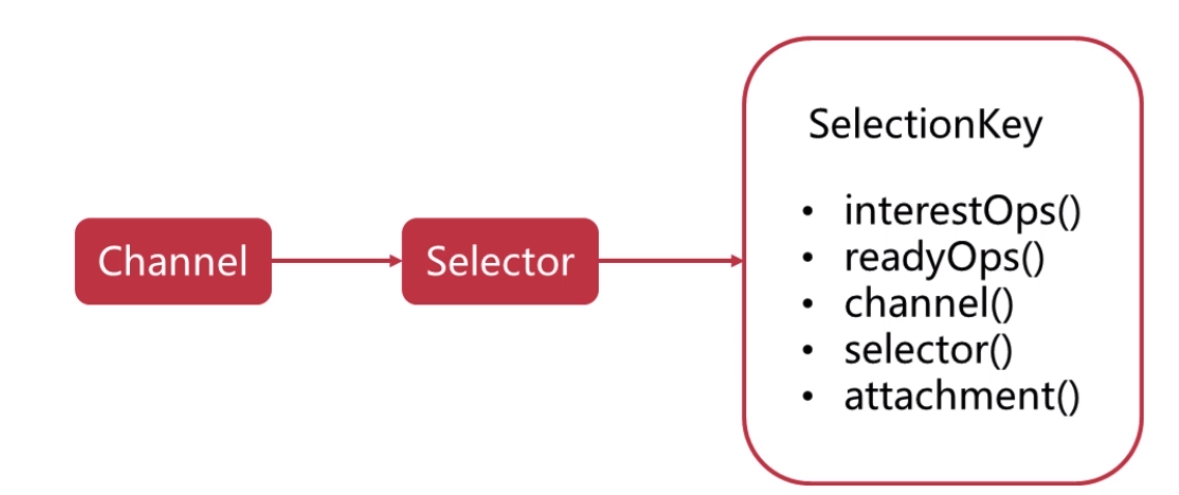
SelectionKey:该对象可以作为当前注册在selector上的channel的唯一标识,通过这个对象也可以获取到当前channel的一些信息
下面展示SelectionKey对象的一些方法:
- interestOps():返回当前channel在selector上面注册的状态
- readyOps():返回当前channel的有哪些被监听的状态是处于准备好的,可操作的状态
- channel():返回selectionkey指代的channel对象
- selector():返回的是当前channel是在哪一个selector上进行的注册
- attachment():关于channel的附加信息
使用selector选择channel
- 第一个channel注册在selector上,并且让selector只去监听当前channel的connect状态
- 后面两个同理
通过select()函数可以返回当前处于可操作状态下的channel

 IDEA激活码


